

How To Turn A Day Photo Into Night In Photoshop
Solar day-to-nighttime conversions have been around for every bit long as Photoshop has had adjustment layers, but mastering the effect takes lots of practice. The fundamental to making a day pic await similar nighttime in Photoshop is in learning to navigate the various adjustments, such every bit the Gradient Map and Curves, to achieve a believable tone.
Darkening the image to such an extent that there'due south inappreciably any particular left in the shadows is function of the technique, and nosotros can further the effect using brushes to change the balance of low-cal on layer masks. The deep-blue tone is created with the Gradient Map adjustment and some of the photographic presets in Photoshop CC. Selections so come into play, swapping out the twenty-four hours sky for a star-filled nightscape.
- fourteen Photoshop adjustment tools to retouch your images
By the end of this Photoshop tutorial, yous should accept all the skills and know-how y'all need to transform whatever daytime image into a night-time masterpiece.
Download the files for this tutorial.
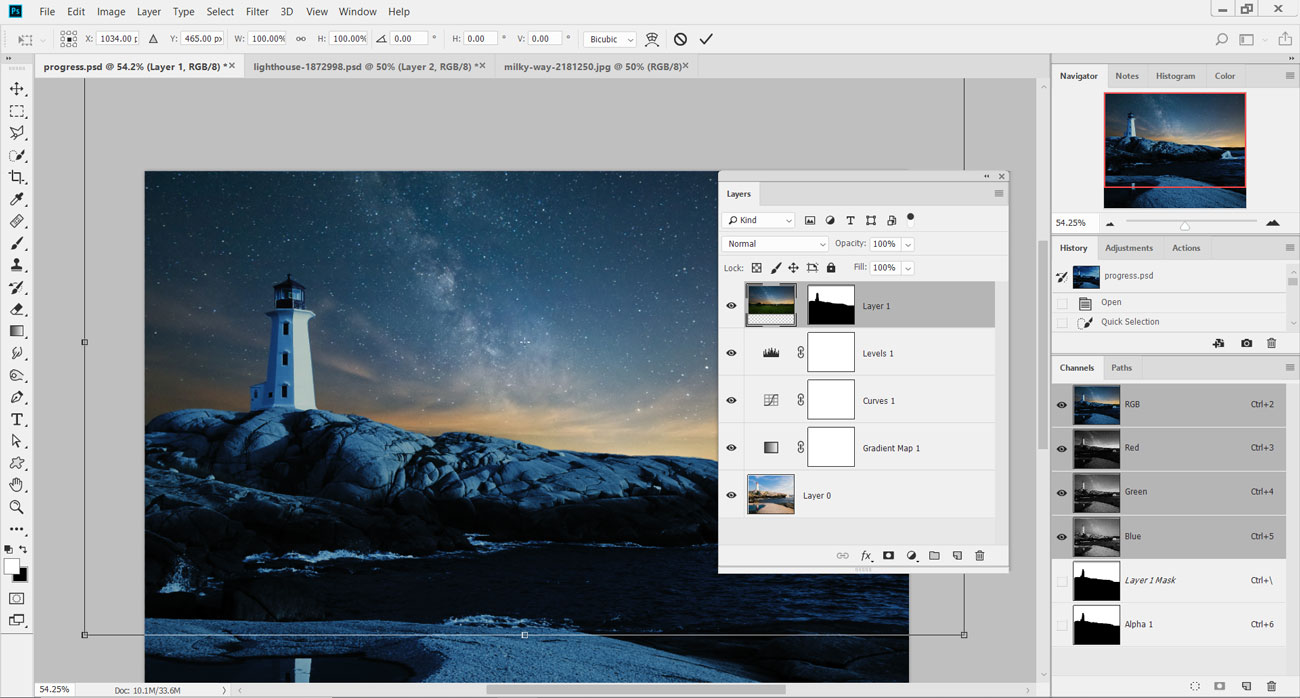
01. Begin with the Gradient Map adjustment
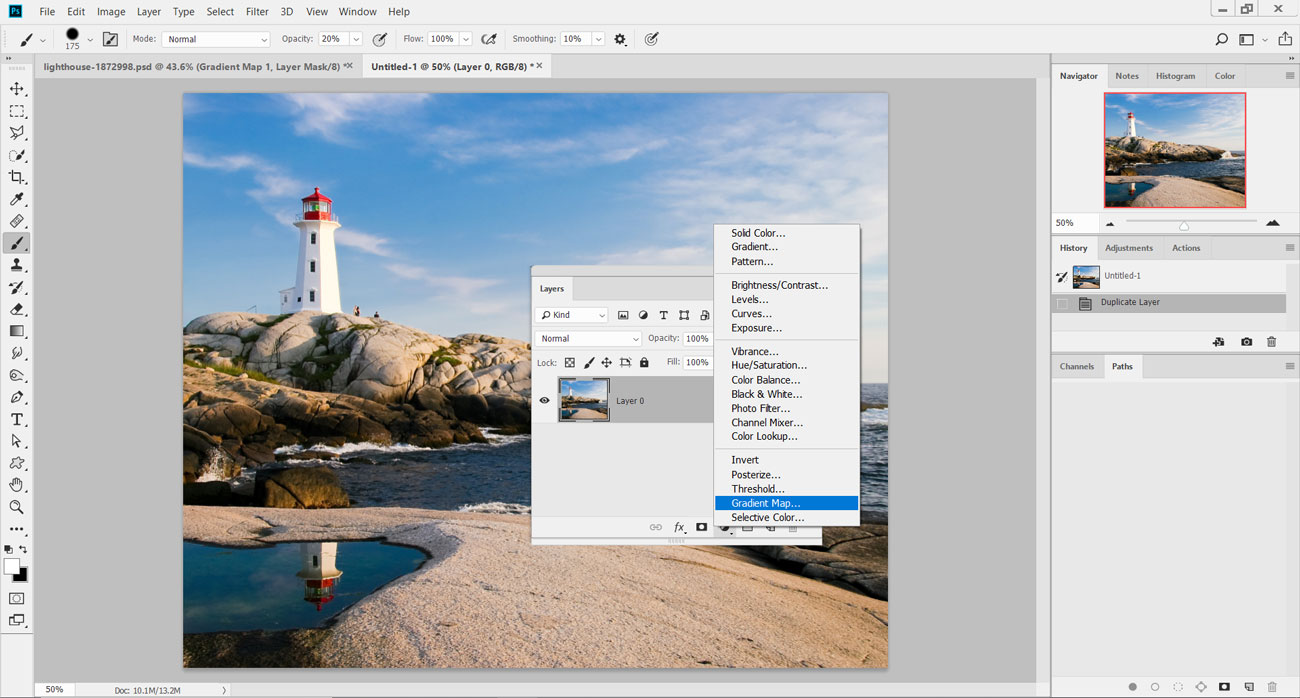
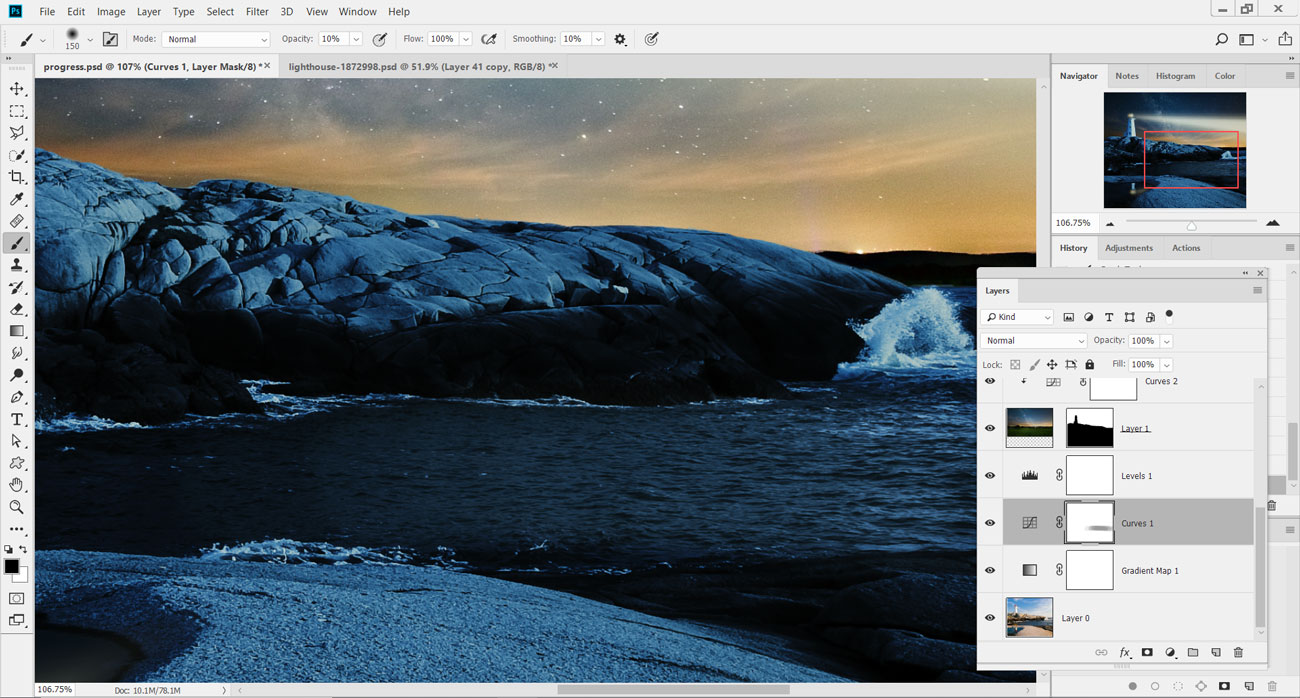
Load up the starting time paradigm 'pix_lighthouse_1872998.jpg' into Photoshop, and caput to the Layers palette. Locate the adjustment layer icon and select Slope Map.
02. Initial tint
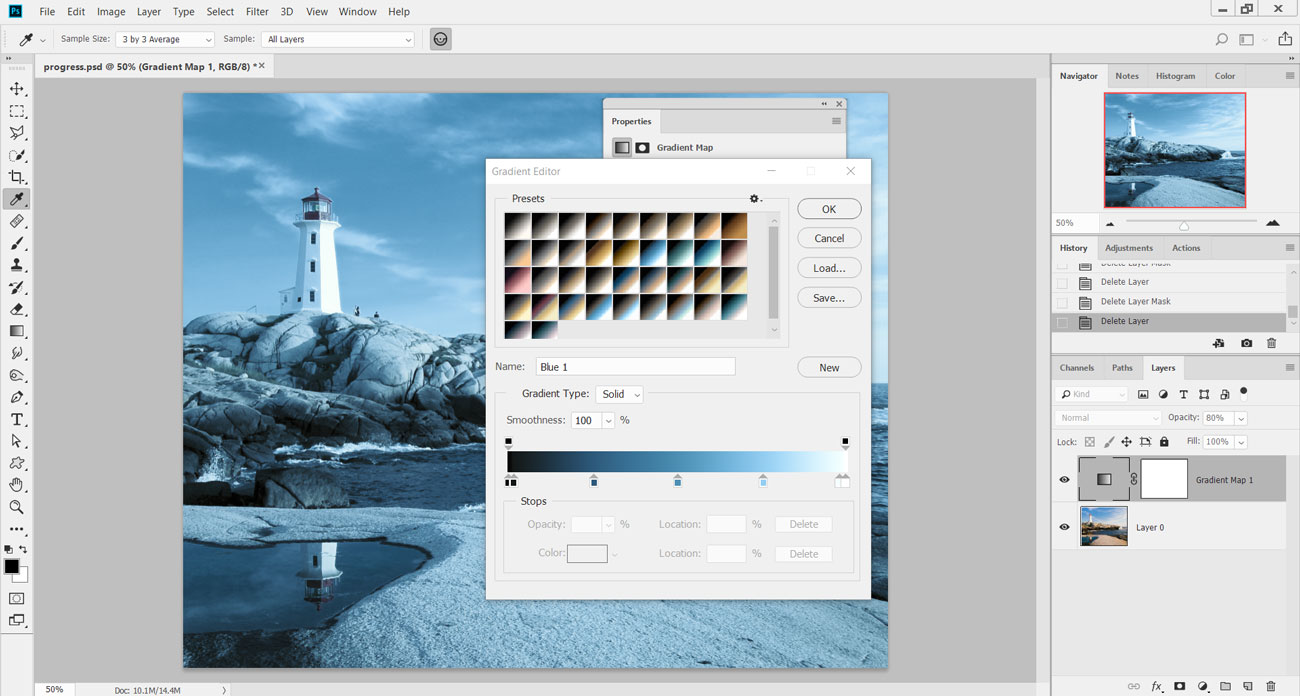
Within the Gradient Map editor, select the Photographic Toning prepare of presets from the drop-down card. From the array of thumbnail gradients, select the preset Bluish 1 and hit OK. This volition tint the prototype with a light blue all over.
- Get Adobe Creative Cloud here
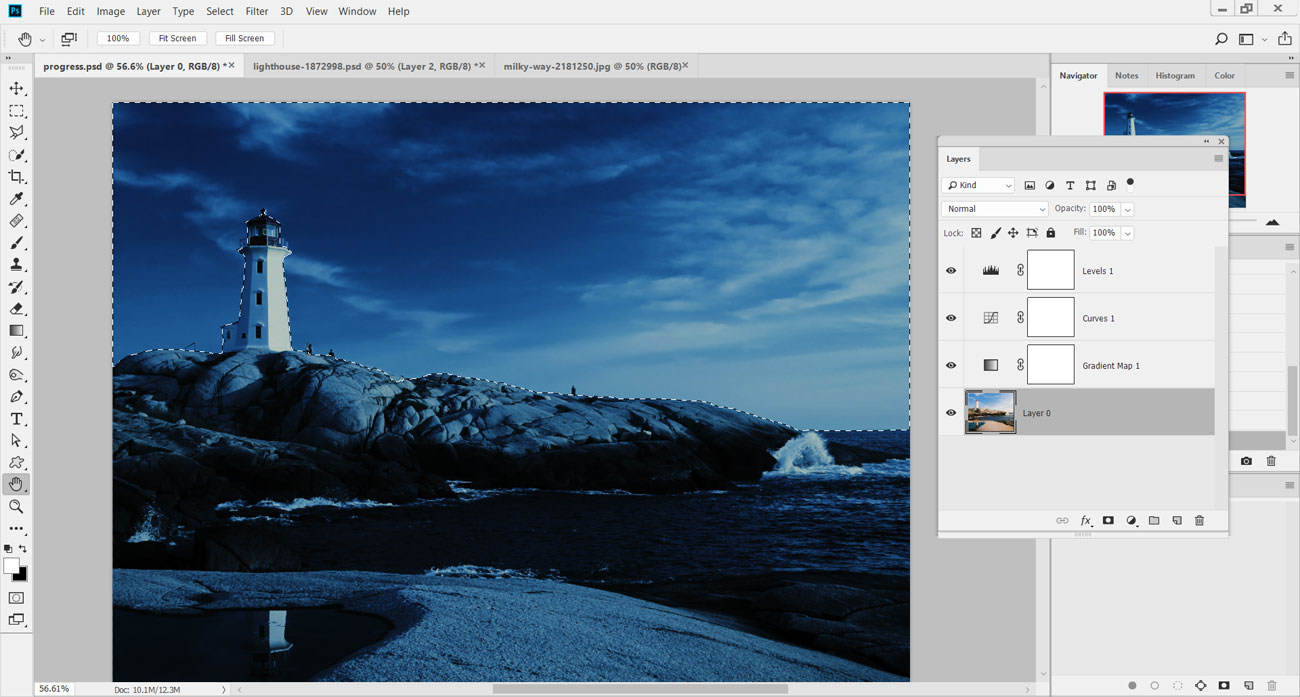
03. Black of dark
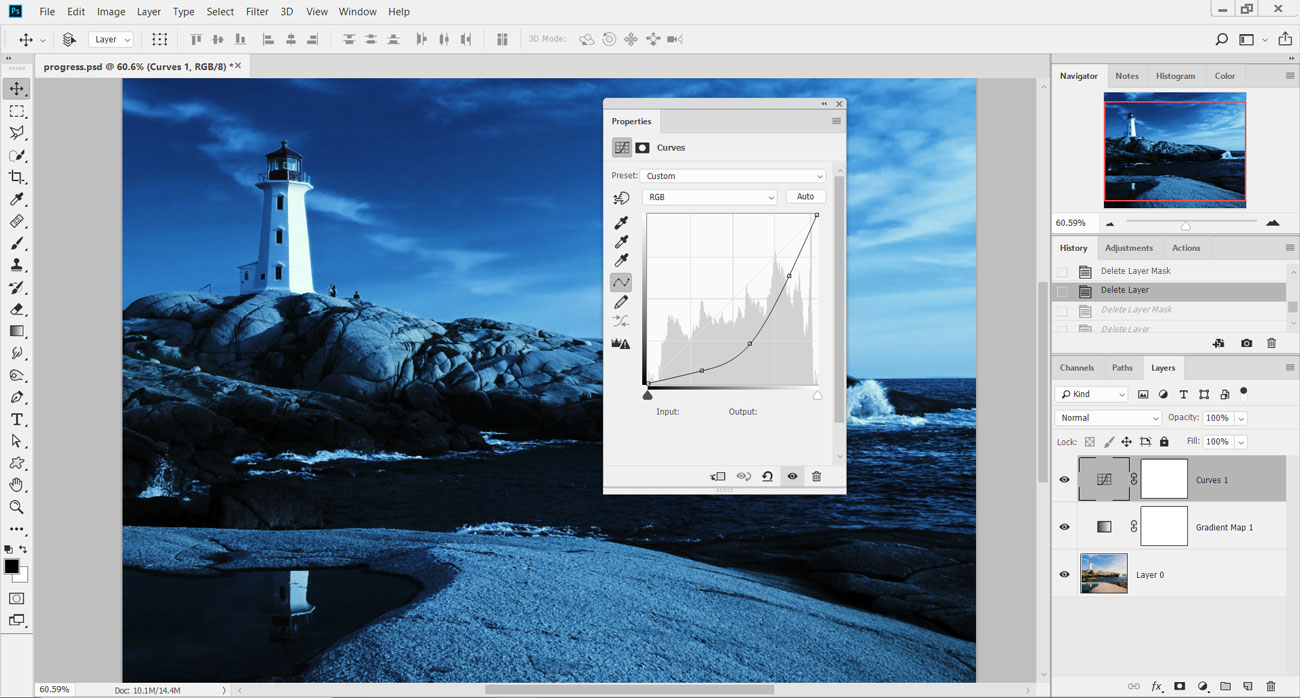
Lower the Opacity of the Slope Map layer to eighty% to reduce the issue slightly, head back to the adjustment layers and add together a Curves adjustment. Darken the image by dragging the curve downwardly from the centre. The idea is to darken the shadows and midtones here.
04. Darken fifty-fifty further
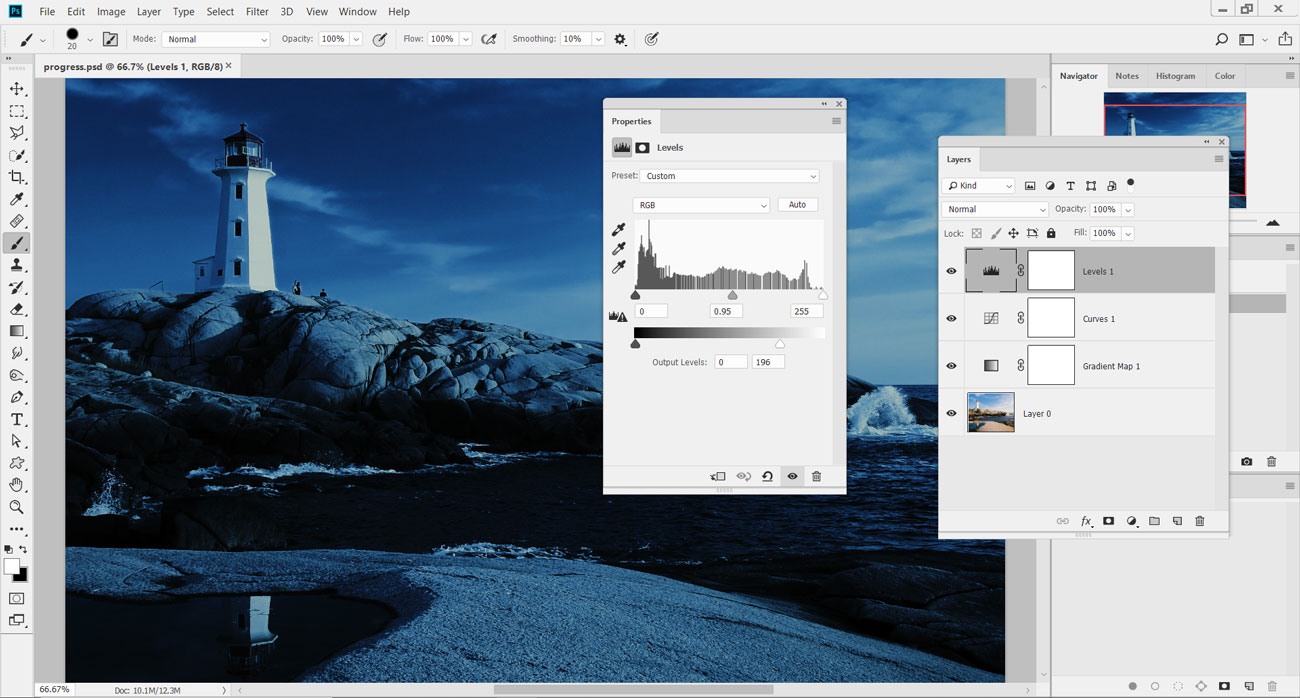
Add together a Levels adjustment layer above the Curves adjustment. Inside the Levels dialog, set the midtones marker to 0.95. So, under Output Levels, gear up to 0 and 196. This adjustment should darken the image further, making it appear every bit though it is night.
05. Select the heaven
Now we've converted the image to night, we need to swap out the heaven. Press W for the Quick Selection Tool and click on the epitome's layer. Drag a rough selection over the sky and around the lighthouse.
06. Improve the selection
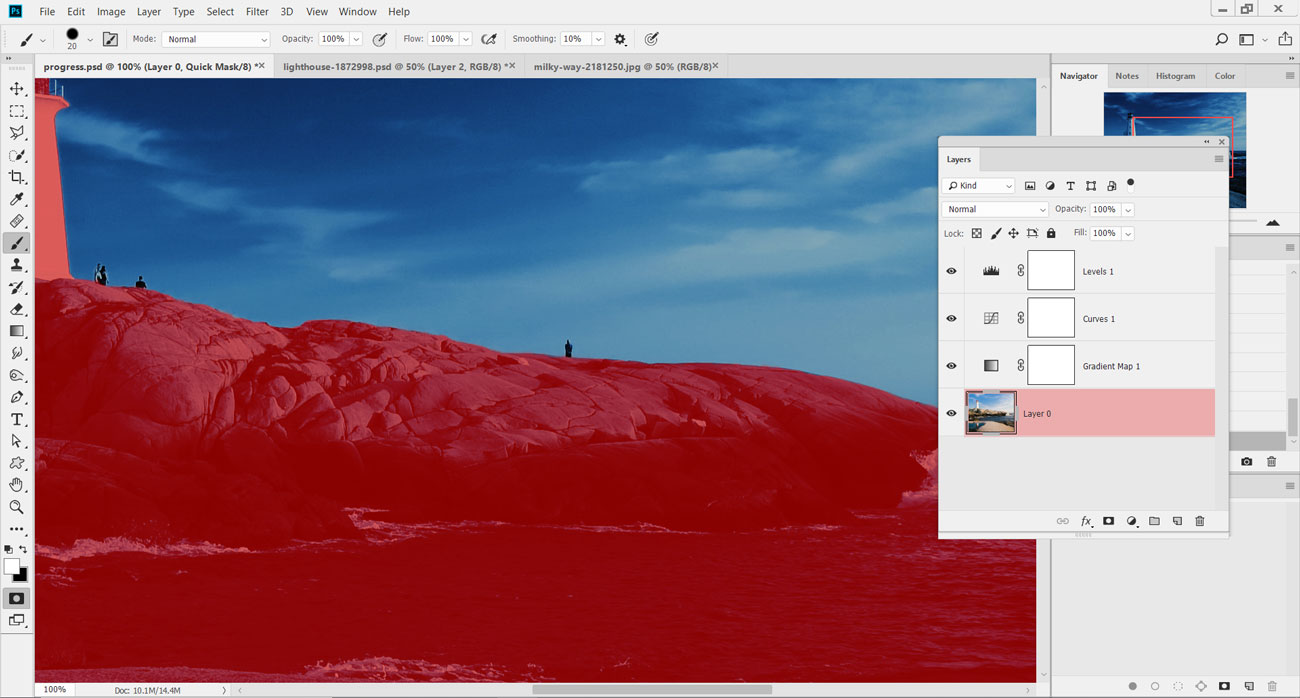
Hold opt/alt to remove areas of the selection that spill over onto the rocks and lighthouse. Press Q to load the Quick Mask Manner and preview the selected area. Utilize the Brush Tool to refine the border of the mask, and press Q to return to normal view.
07. Save the selection
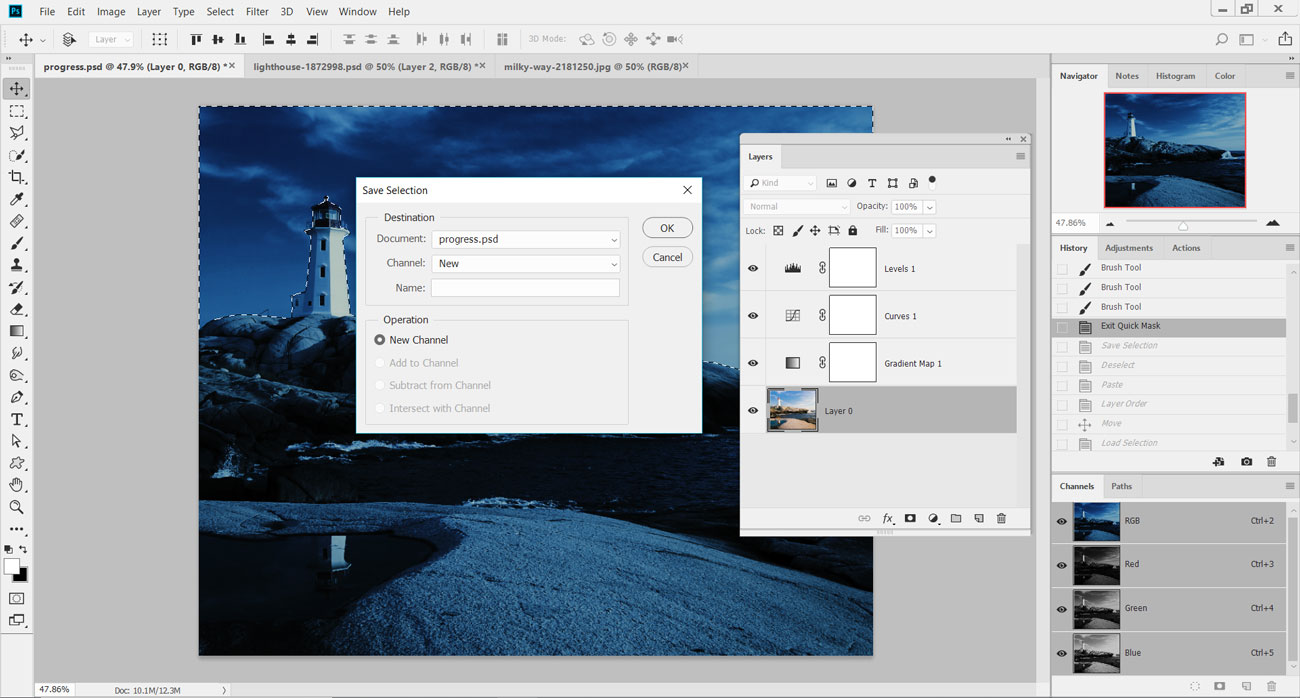
Go to the Select card and down to Relieve Selection. In the popular-up menu, prepare Document to the current image, and set Aqueduct to New. Leave Proper name as blank and hit OK to add together the selection equally a new Alpha Aqueduct (Window > Channels to view).
08. Quick copy and paste
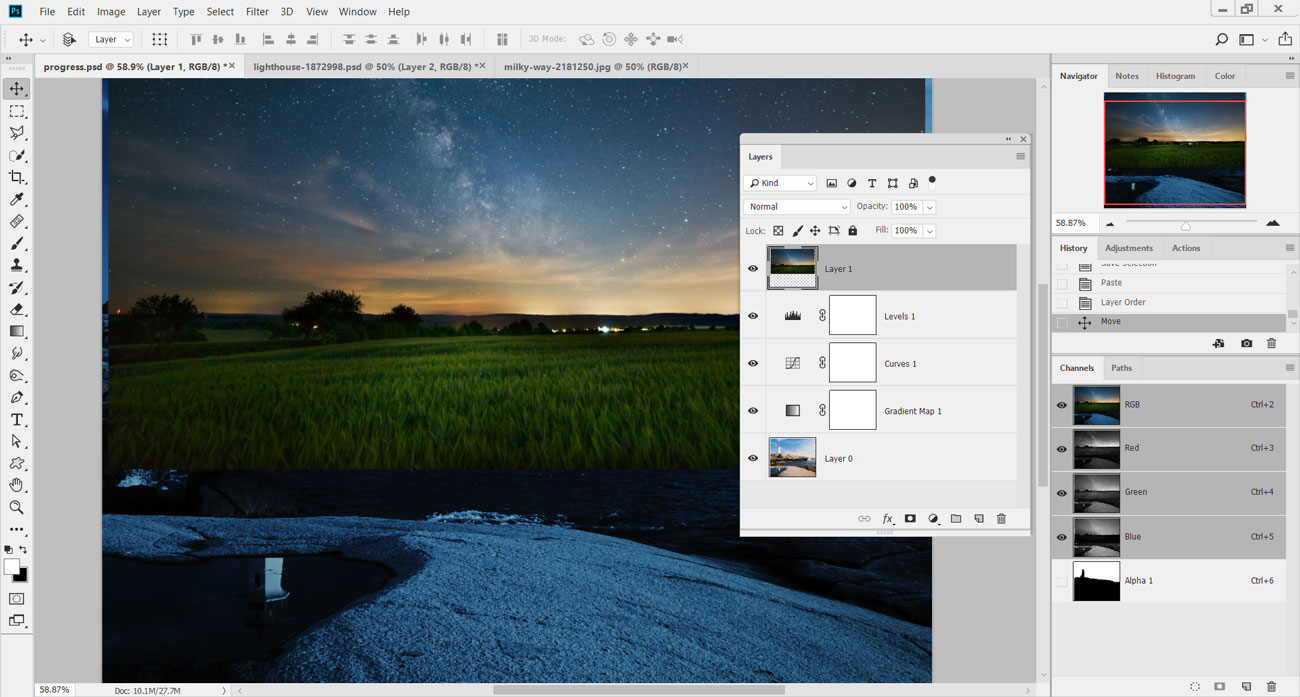
Load upward the paradigm 'pix_milkyway_2181250.jpg' from the FileSilo and printing cmd/ctrl+A to select the unabridged image, then cmd/ctrl+C to copy. Head dorsum to the lighthouse image and press cmd/ctrl+V to paste the new sky onto the image. Move this prototype to the top of the layer stack.
09. Utilise a layer mask
In the Channels palette, cmd/ctrl-click on the thumbnail of the Alpha Aqueduct created in step seven. On the new heaven layer, add a layer mask to utilise the selection. Click on the small chain link symbol between the mask and the thumbnail, and press cmd/ctrl+T to resize the sky to fit over the area.
x. New Curves adjustment
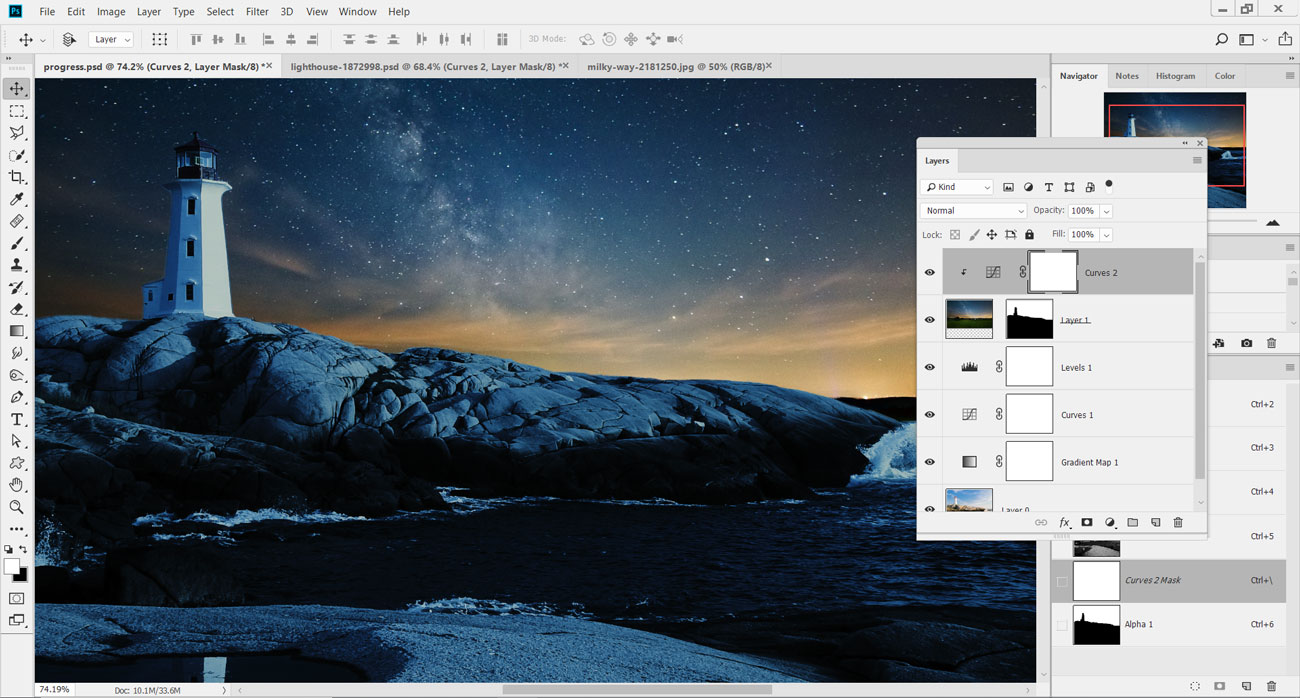
Add a new Curves adjustment in a higher place the new sky layer and clip them together (opt/alt-click betwixt their layers). Lower the brightness of the new sky layer by pulling down the centre of the Curves adjustment. Adding iii points along the line and lowering them all slightly provides more accurateness.
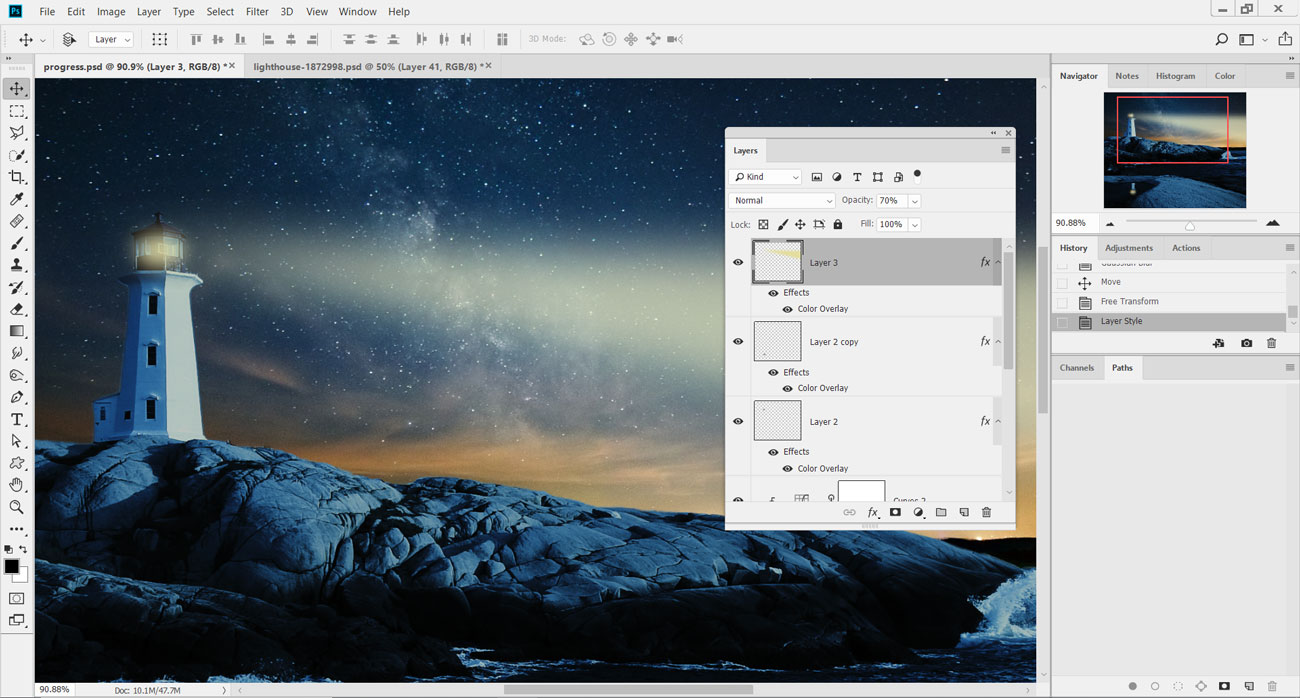
11. Paint in light
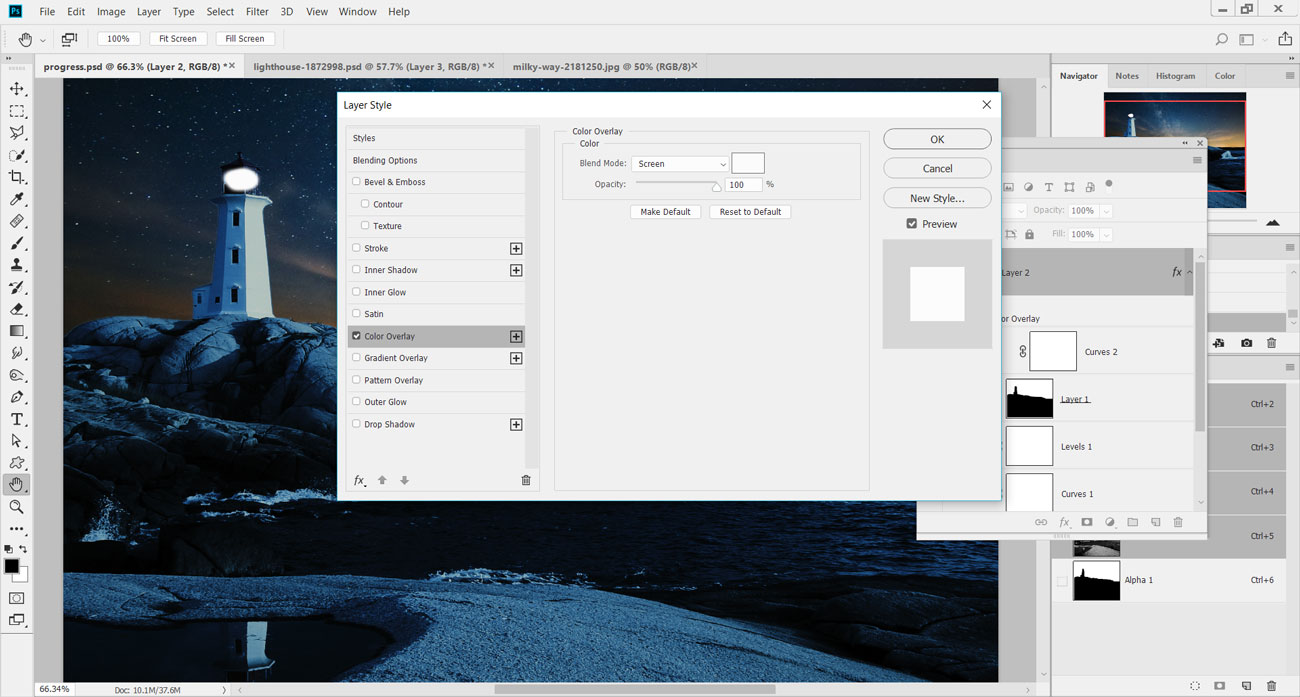
Add together in a new layer and select the Brush Tool. Set the tool to blackness and 0% Hardness and paint in the small low-cal for the lighthouse. To choose the colour of the low-cal, double-click on the layer to load the Layer Way carte, and then select the Color Overlay choice.
12. Add a Colour Overlay
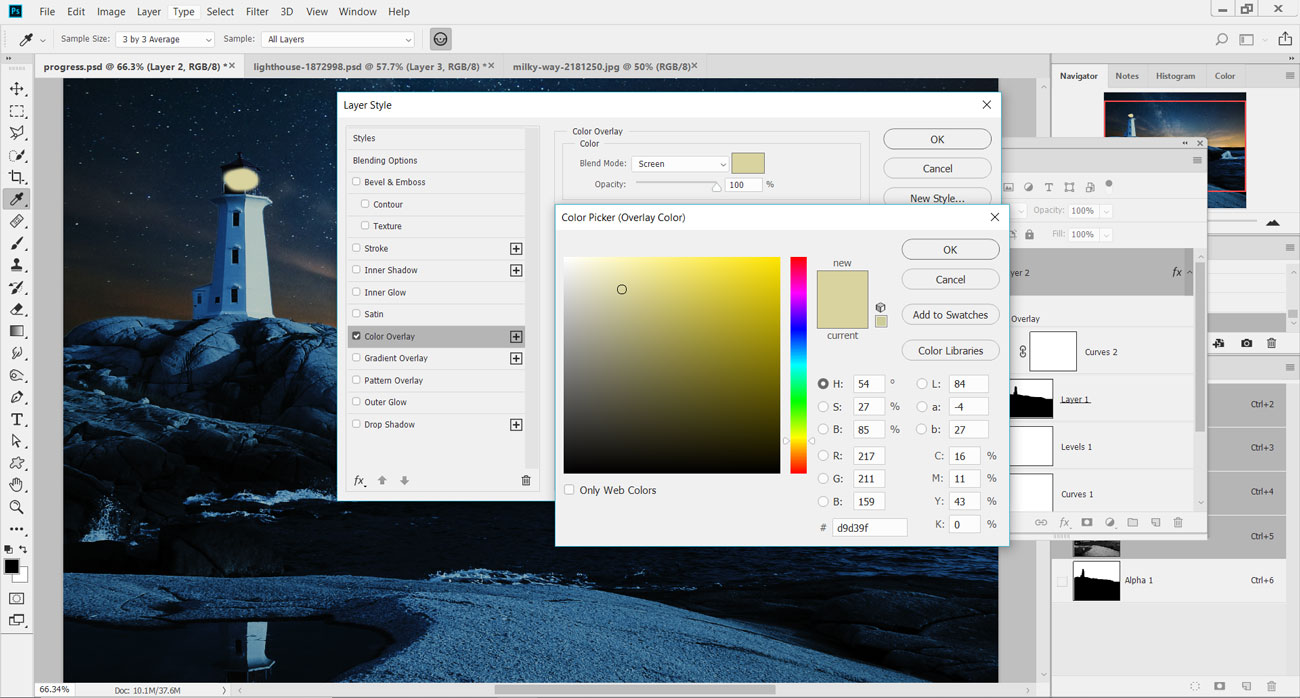
Change the colour of the Color Overlay way to an orangey yellow and set up its Mode to Screen. Setting colour this way will enable you to change information technology afterward, if needed. Hitting OK and lower the Opacity of the layer down to 85% to fade it slightly.
13. Blur the calorie-free
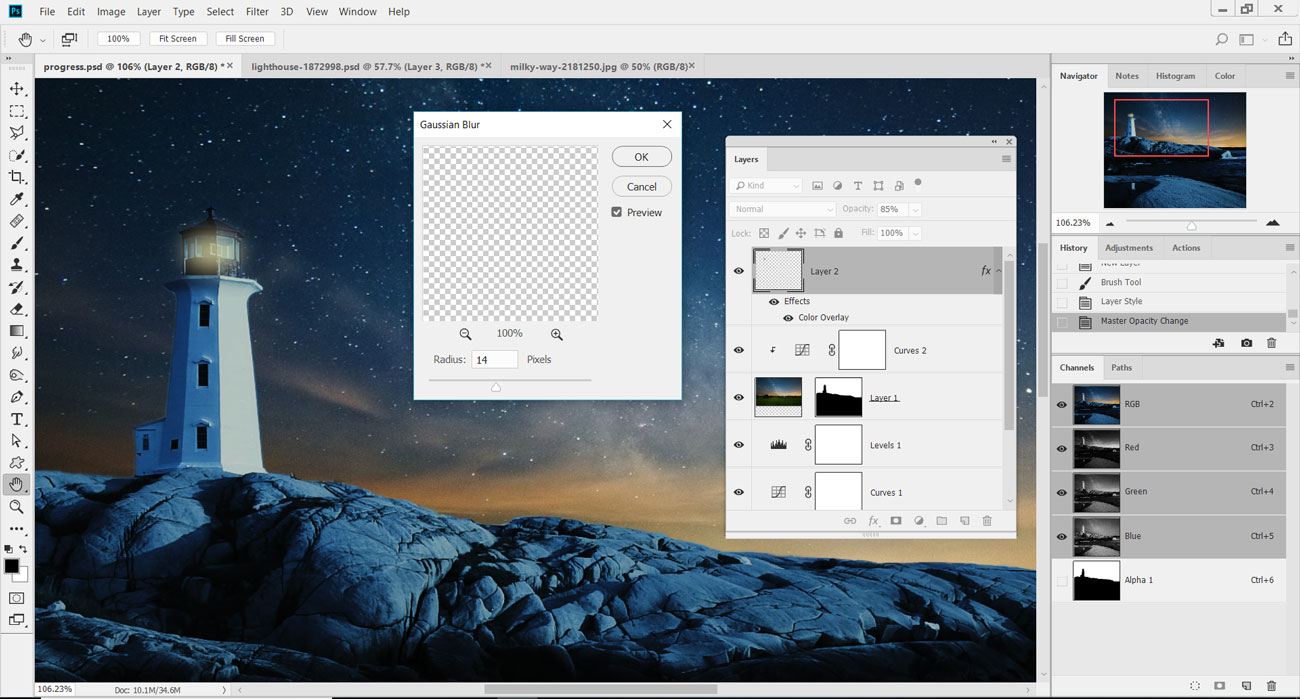
Head to the Filter menu and down to Blur > Gaussian Blur. Set the Radius slider to 14px and hit OK to soften the calorie-free in the lighthouse. Load up the Gratis Transform controls (cmd/ctrl+T) and resize or rotate the light to fit inside the lighthouse.
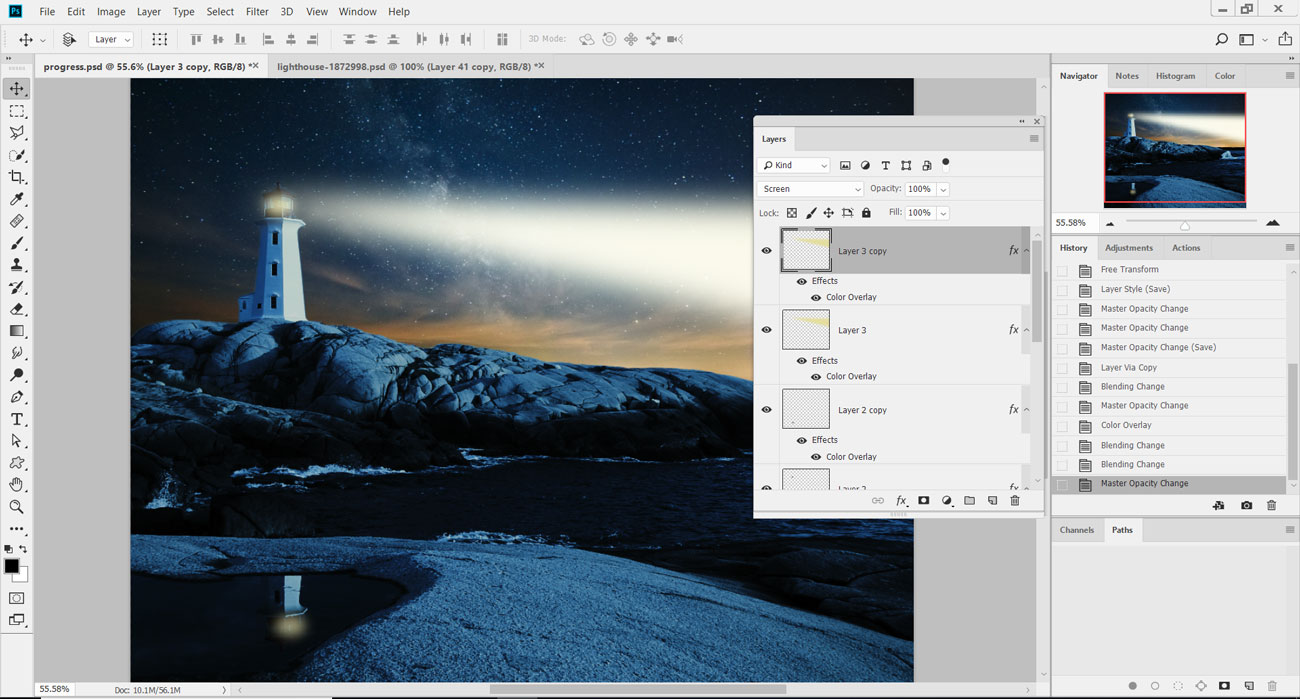
14. Create the reflection
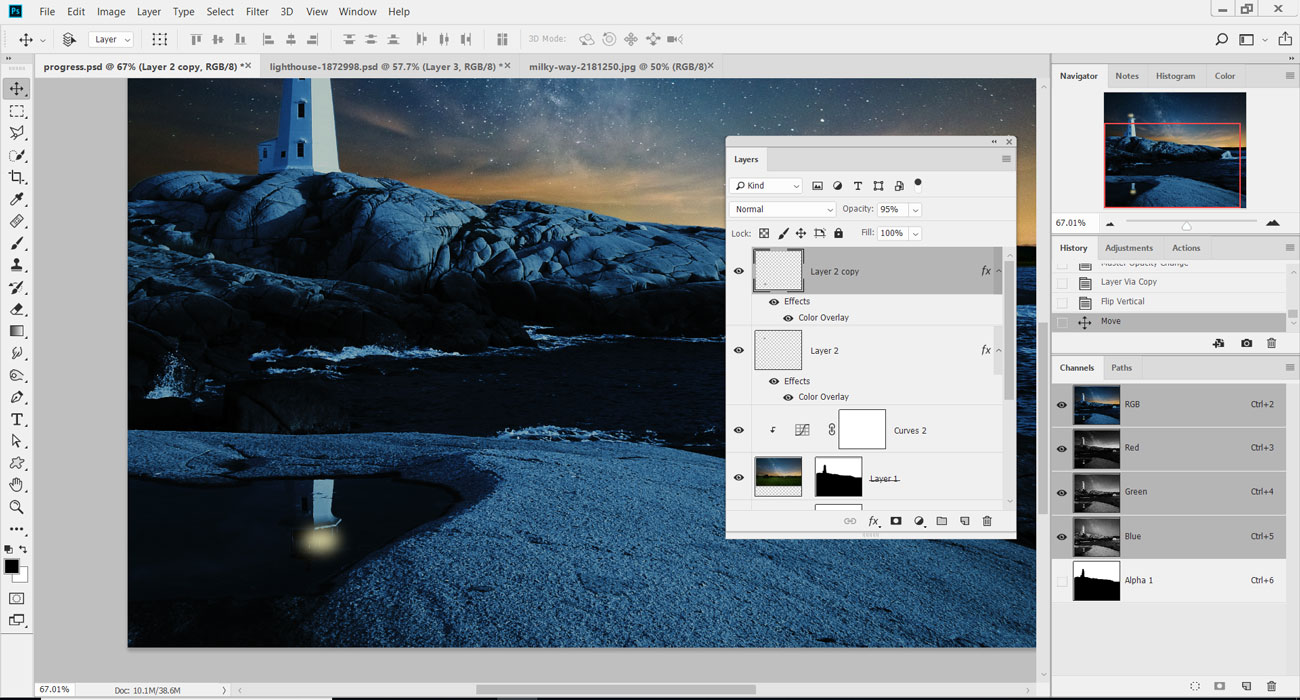
Press cmd/ctrl+J to duplicate the light layer onto a split up layer. Get to Edit> Transform> Flip Vertical to rotate the light and flip it. Utilise the Movement Tool to position it over the reflection of the lighthouse in the puddle in the foreground.
fifteen. Light rays
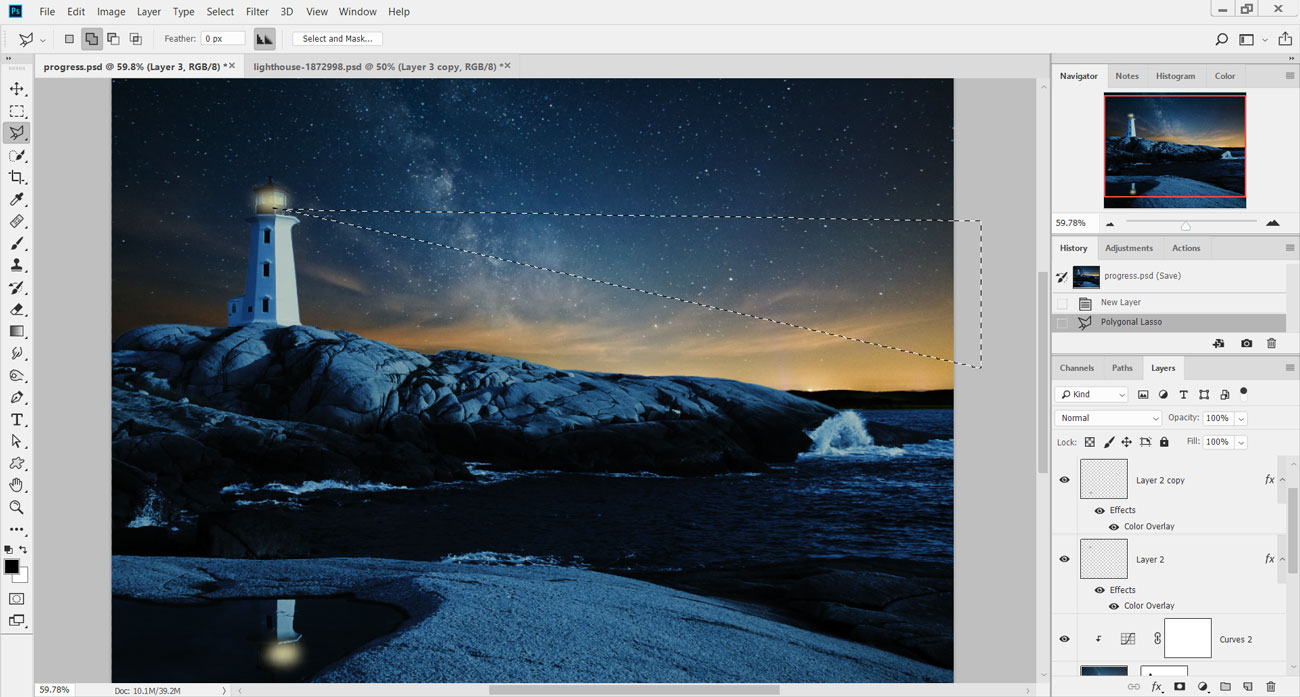
To add the beams of low-cal from the lighthouse, on a new layer (cmd/ctrl+shift+Due north) create a long rectangle using the Polygonal Lasso Tool (L). The shape should extend out from the lighthouse and across the entire prototype.
xvi. Fill with colour
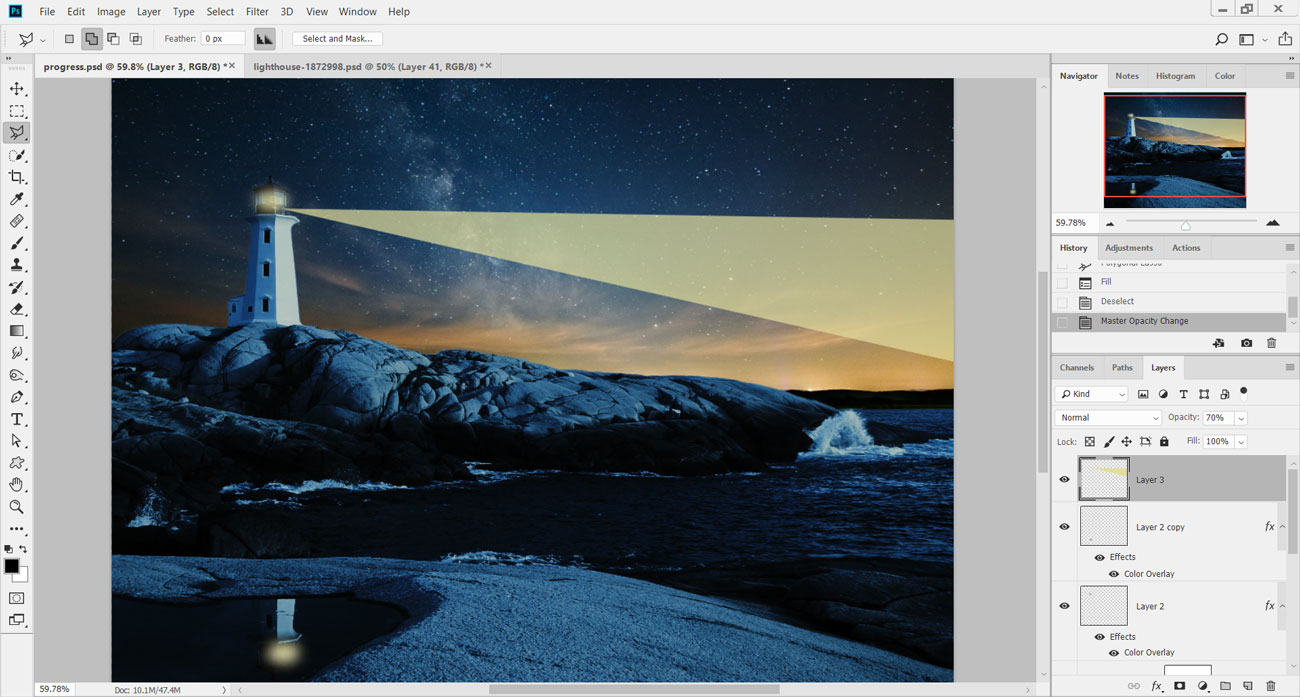
Go to Edit > Fill and cull Color under Contents. Set this to a yellow colour that is similar to, merely lighter than, the colour used for the main light in the lighthouse. Hit OK, and then cmd/ctrl+D to remove the selection, and then reduce the layer's Opacity setting downwards to 70%.
17. Soften and colourise
To soften the lite beam, go to Filter and down to Blur > Gaussian Blur. Set the Radius for the blur to 36px and hit OK. Double-click on the layer and add a Color Overlay manner to change the tone of the calorie-free, if you lot remember it's required.
18. Double the lite
Duplicate this layer (cmd/ctrfifty+J) and then alter the Color Overlay style to a lighter yellow, about white. Set the layer'due south blend style to Screen in the Layers palette to alloy into the light beam underneath.
xix. Resize the second axle
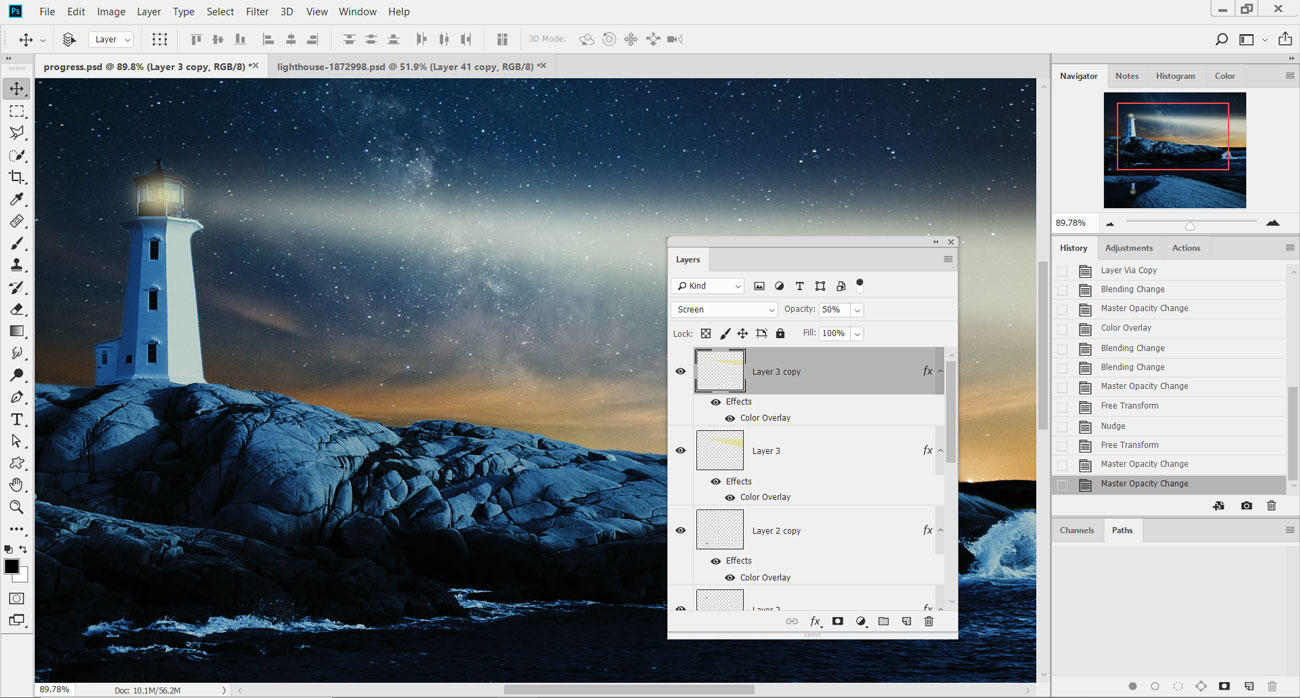
Shrink the second light beam and so that it's smaller than the 1 underneath. Lower the Opacity of this layer to 50% to make it fainter. The result should be two light beams coming out of the lighthouse, one on top of the other.
20. Duplicate and reposition
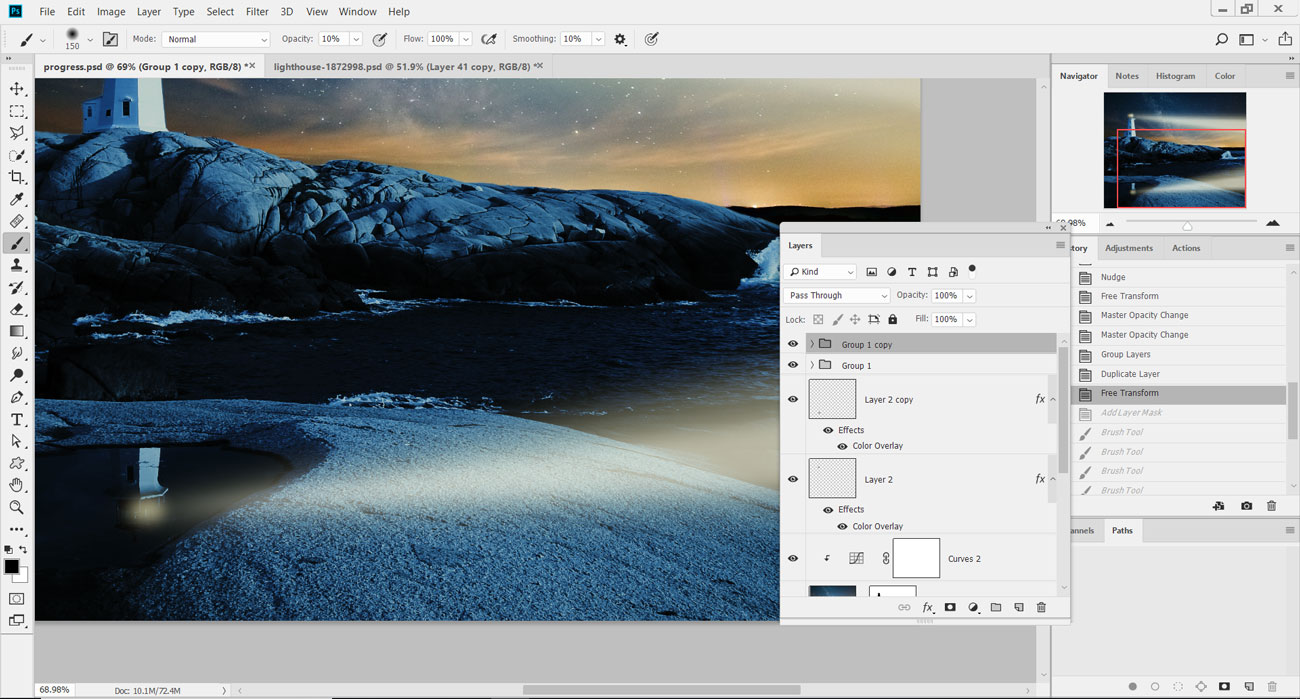
Grouping the ii low-cal beam layers together and press cmd/ctrl+J to duplicate the group. Flip the grouping vertically (Edit > Transform > Flip Vertical) and position so the light beams are included in the reflection of the lighthouse.
21. Control with masks
Add together a layer mask to the group and brush away the light that falls exterior the water. Also, on the Curves aligning layer's mask, employ a depression Opacity brush over the ocean in the foreground to reveal more item on the h2o.
22. Explore a different approach
Fancy trying a different approach? In the video in a higher place, Ben Underground walks through his technique for how to brand a twenty-four hours movie look like night in Photoshop. He starts by calculation a Curves adjustment layer, and altering the balance of levels to brand the light cooler. Side by side, he creates a soft, moonlit look with some other Curves layer and a mask. Finally he balances the colouring and adds in a moon and clouds. Watch the full video to meet how it's done.
Related manufactures:
- How to use textures in Photoshop
- The 61 all-time complimentary Photoshop brushes
- How to apply Smart layers in Photoshop
Source: https://www.creativebloq.com/how-to/turn-day-into-night-in-photoshop
Posted by: dumontaftes1955.blogspot.com
0 Response to "How To Turn A Day Photo Into Night In Photoshop"
Post a Comment